Door Closure Adjustment: How to Do It – Top Tips with Videos

Table of Contents
ToggleAdjusting a door closer ensures that your door closes smoothly and securely, maintaining both safety and energy efficiency. A door closer is a mechanical device installed at the top of a door to control its motion, ensuring it shuts automatically after someone passes through.
Learning to adjust the door closer correctly can save you from potential issues that range from door slams to doors that won’t close fully, which could compromise security and climate control in your building.
Before starting the adjustment process, it’s important to understand the various settings that can be modified. These typically include the swing speed, which influences how fast the door closes; the latch speed, affecting the last few inches of closing; and the back check, determining the resistance to opening the door beyond a set point.
Some models may also feature a delayed action setting that holds the door open for a longer period. Using appropriate tools, such as a screwdriver or hex key, you can make minor adjustments to these settings to enhance the door’s functionality and prolong its lifespan.
Key Takeaways
- Adjusting your door closer is key to door functionality and longevity.
- Familiarize yourself with the closer’s adjustment settings for optimal performance.
- Regular maintenance ensures continued quality and compliance with safety standards.
Understanding Door Closers
In commercial and public buildings, you’ll often find door closers to ensure doors are consistently closed after being opened, enhancing security and energy efficiency.
Types of Door Closers
Door closers can be classified into different types, each with its specific applications and installation methods:
Surface-Mounted Closers: These are the most common and are attached to the door or frame.
Concealed Closers: Installed into the door or door frame for aesthetic purposes.
Floor-Spring Closers: Mounted in the floor, commonly used on glass storefront doors.
Electromagnetic Closers: Operate in conjunction with a fire alarm system, ensuring doors close in the event of a fire.
Mechanical Parts of a Door Closer
Your door closer’s efficiency relies on its mechanical components:
- Spring Mechanism: Controls the force with which the door closes.
- Adjustment Valves/Screws: Allow you to modify the closing speed and force.
It’s crucial to understand these parts for proper maintenance and adjustment.
Hydraulic Door Closer Systems
Hydraulic door closers harness fluid-filled chambers to manage the door’s movement:
- As you open the door, hydraulic fluid moves between reservoirs, allowing a controlled and smooth motion.
- By adjusting the tension in the spring mechanism and the viscosity of the hydraulic fluid, you alter the door’s speed and force when closing.
With this understanding, you’re better equipped to maintain and adjust your door closer for optimal performance and longevity.
Tools and Materials
Before you begin the process of adjusting a door closer, gathering the correct tools and materials is essential for a smooth and successful adjustment.
Basic Adjustment Tools
For standard adjustments of most door closers, you will need the following tools:
- Screwdriver: Both flat-head and Phillips head screwdrivers may be needed depending on the screws present on your door closer.
- Hex Key: Also known as an Allen wrench, this tool is crucial for turning hexagonal screws often found on door hardware.
- Wrench: An adjustable wrench can be handy for manipulating nuts and bolts that may be a part of the door closer assembly.
These tools are generally used to access and adjust the main control valves of a door closer that modulate closing speed and force.
Additional Maintenance Tools
Occasionally, you might require some extra tools for thorough maintenance or when you’re performing more complex adjustments:
- Silicone Spray: For lubricating joints and moving parts to ensure smooth operation.
- Clean Cloth: To clean any debris and excess lubricant during the maintenance process.
It’s important to have these tools on hand to keep your door closer functioning effectively after adjustments are made.
Pre-Adjustment Procedures
Before starting adjustments to a door closer, it’s critical to review safety information and prepare your work area properly. The success of the adjustment hinges on understanding the mechanisms involved and the potential hazards.
Safety Considerations for Door Adjustment
Wear safety gear: Always put on safety goggles to protect your eyes from any debris that might dislodge during the adjustment process.
Review the user manual: Consult the manufacturer’s instructions for your specific model. Each door closer may have unique features that require certain precautions.
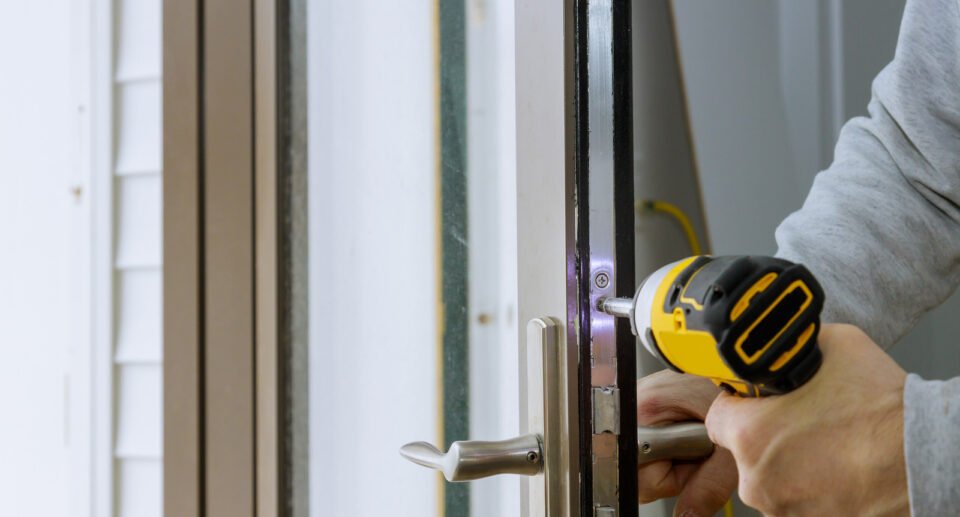
Understand the tools: Make sure you have the correct tools as specified by the manufacturer, usually a screwdriver or an Allen key, to adjust the closer. Using the wrong tools can damage the mechanism.
Preparing the Work Area
Clear the space: Ensure the area around the door is free from obstacles that could pose a trip hazard while you’re working.
Secure the door: Open the door fully and secure it to prevent it from moving while you make adjustments.
Locate the adjustment screws: Prior to making any changes, identify the adjustment screws for closing speed, latch speed, and back check. They are usually covered by a cap or sleeve.
By adhering to these pre-adjustment procedures, you create a safe and efficient environment for maintaining the operation of your door closer.
Adjustment Steps
Properly adjusting a door closer ensures it closes securely and safely. Precision is key to maintaining door integrity and function.
Adjusting Closing and Latching Speed
Closing Speed:
- Adjust: Use the S (sweep speed) valve.
- Increase: Turn counter-clockwise.
- Decrease: Turn clockwise.
Latching Speed:
- Adjust: Locate the L (latch speed) valve.
- Quicker Latch: Turn counter-clockwise slightly.
- Slower Latch: Turn clockwise for a gentler close.
Regulating Swing Speed and Back Check
Swing Speed:
- Adjust: Typically involves manipulating the S valve, regulating the main speed.
- Increase: Counter-clockwise rotation.
- Decrease: Clockwise to slow the swing prior to latching phase.
Back Check:
- Adjust: Utilize the B valve to set the resistance when the door is fully opened.
- Increase Resistance: Turn clockwise to prevent the door from slamming into the wall.
- Decrease Resistance: Counter-clockwise adjustment lowers resistance for easier opening.
Setting Delayed Action
Delayed Action:
- Adjust: Some closers have a separate valve marked DA for this function.
- Set: A clockwise turn delays the closing from the open position, allowing for extended access.
- Reset: Counter-clockwise will minimize the delay and resume normal closing speed.
Make small adjustments to avoid overcorrection. After each tweak, test the door’s movement and continue adjusting as needed, ensuring a smooth operation.
Troubleshooting Common Issues
In maintaining door closers, recognizing common issues and understanding how to address them is crucial for both safety and functionality.
Dealing with Noisy or Leaky Closers
If your door closer is making noise or you notice leaking fluid, it’s likely due to internal problems like a broken seal or air in the hydraulics. To fix the issue:
- Check for visible leaks and tighten any loose screws.
- If noise persists, a replacement may be necessary as internal components could be worn out.
Fixing Fast or Slow Door Closures
A door that closes too fast or too slow poses safety risks and can be disruptive. For adjustment:
- To slow down a door, turn the latch speed adjustment screw clockwise.
- Conversely, turn it counter-clockwise to make the door close faster.
Replacing Worn or Damaged Parts
Problems with closing can often be attributed to worn out or damaged parts, necessitating replacement for proper door function.
- Regularly inspect the closer for worn out components.
- Replace parts that are no longer providing adequate support or smooth operation.
Fine-Tuning for Optimal Performance
Fine-tuning a door closer is crucial to ensure smooth operation and longevity. Paying attention to minor adjustments can significantly enhance the closer’s performance, particularly in challenging environmental conditions.
Minor Adjustments for Smooth Operation
Proper adjustment of your door closer can prevent wear and protect the door from damage. For smooth operation, consider the following steps:
- Closing Speed: Verify that the door’s closing speed is neither too fast nor too slow. Adjust the closing speed valve, turning it clockwise to slow down or counter-clockwise to speed up.
- Latching Speed: Ensure that the final few inches of closing don’t slam the door. Adjust the latching speed valve similarly to the closing speed.
- Backcheck: The backcheck prevents the door from opening too quickly, especially important in high-traffic areas. Adjust the backcheck valve to manage the resistance felt when the door is fully opened.
Note: Always start with the closing speed and end with the latching speed to ensure a seamless door motion.
Combatting Environmental Factors
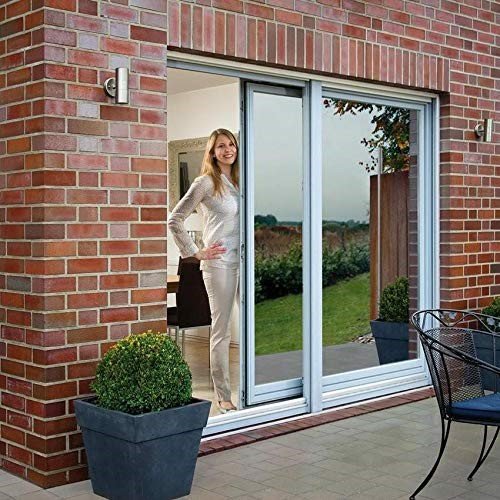
Adjusting a door closer to withstand environmental factors requires special consideration, especially for an outside door exposed to conditions like wind:
- Wind Resistance: To counteract high winds, slightly increase the closing force to prevent the door from staying ajar.
- Seasonal Changes: Temperature fluctuations can affect hydraulic fluid viscosity. Adjust the valves seasonally for consistent performance.
Remember, regular maintenance of your door closer will defend against the unpredictable nature of the outdoors and ensure optimal closure throughout the year.
Maintenance and Care
Proper maintenance and care are crucial to ensuring that your door closer operates smoothly and has a long lifespan. Attention to lubrication, cleaning, and regular inspections helps in preventing wear and tear and in maintaining the integrity of the door closer’s mechanism.
Lubrication and Cleaning
To maintain the reliability of your door closer:
- Lubricate the moving parts regularly with a suitable oil to reduce friction and prevent the wear of internal components such as seals. Apply lubricant to the arm pivot points and bearing areas.
- Clean the door closer body periodically with a soft, non-abrasive cloth to remove dust and grime that can accumulate over time and affect performance.
Regular Inspection Cycles
Set a schedule for inspections to ensure timely maintenance:
- Monthly: Check for signs of oil leakage or unusual sounds, which may indicate a seal failure or a need for lubrication.
- Annually: Conduct a comprehensive review of the closer’s adjustment settings and overall functionality. Re-tighten any fasteners, confirm that the door closer’s speed and force are appropriate, and check for any irregularities in door operation.
By adhering to these maintenance and care procedures, your door closer should remain functional and robust, limiting the need for extensive repairs or replacements.
Advanced Adjustments and Replacements
Adjusting the hydraulic valves and seals on a door closer can refine its performance, but certain adjustments and replacements require expertise. Here’s what you need to know.
Working with Hydraulic Valves and Seals
When working with hydraulic valves, it’s essential to first remove the cover to access the valves. This process is often done with a screwdriver and should be approached with care to avoid damaging the closer. Once exposed, the hydraulic valves control the closing speed and force (forc) of the door. Turning the valves clockwise generally increases the force or speed, and turning them counterclockwise decreases it.
To replace a seal within the cylinder, ensure that you have the correct manufacturer’s seal kit. Replacing seals is a delicate process that involves disassembling parts of the hydraulic system, and careful handling is required to prevent oil leaks or air bubbles from compromising the door closer’s functionality.
When to Call a Professional
You should call a professional when:
- The adjustments you’ve attempted do not yield improvements.
- There’s excessive leaking oil from the cylinder, signifying a seal failure.
- The door closer needs to be replaced entirely.
- You’re unsure about the type of door closer and how to handle advanced adjustments.
A professional can assess whether the door closer can be repaired or if it’s more cost-effective to replace a door closer. They’ll have the necessary tools and expertise to ensure your safety and the door’s compliance with building codes.
Regulatory Compliance
To ensure safety and legal conformity, your door closers must comply with specific regulations. Adjusting door closers requires a careful understanding of these requirements.
Fire Door Specifics
Fire doors are subject to stringent standards to maintain their integrity as a critical safety feature. You need to comply with the National Fire Protection Association (NFPA) standards, particularly:
- NFPA 80: This regulation directs that fire doors, including their closing mechanisms, must operate effectively to prevent the spread of fire and smoke. Your door closer must ensure that the fire door closes fully after each opening.
To adhere to these standards:
- Check Door Closer Operation:
- Ensure the door closer manages to shut the door completely without any gaps.
- Confirm the latching mechanism works correctly, and the door stays shut once closed.
- Examine Adjustable Settings:
- Closing speed: The closer must not shut the door too quickly to be unsafe or too slowly, compromising the fire door’s purpose.
- Latching speed: Adjust strictly to enable the door to latch securely without slamming shut, as required by the regulations.
Complying with the NFPA standards is essential for the safety of occupants and the legal operation of your facility. Regular checks and maintenance will keep your fire doors functioning as intended.
Frequently Asked Questions
Adjusting your door closer ensures that doors shut safely and securely. The adjustment process typically involves manipulating valves or screws on the closer to control the mechanisms governing speed and force.
Your door closer will have adjustment screws for controlling the closing speed. Turn these screws clockwise to slow down the closing speed or counterclockwise to increase it.
Inspect the arm and screws for any visible issues and ensure they’re tight. You may need to adjust the closing force or check the hydraulic fluid if applicable.
Locate the tension adjustment screw on the end of the closer tube. To prevent slamming, turn it slightly clockwise to increase resistance, making the door close more gently.
The ‘L’ adjustment controls the latching speed—the final few inches before the door closes completely. The ‘S’ adjustment governs the sweep speed, which is the main speed at which the door closes.
Adjustment screws are typically found on the end of the closer body or behind the cover, if there is one. Surface-mounted closers usually have these visible, while concealed models have them within the door frame or closer body.
Access the valve adjustment screws after removing the cover, if present. For alignment, adjust the arm’s position. For closing, tweak the valves for backcheck, latching, and sweep, as needed.

Hello, I’m Keith Jones. I’m the author and head of content here of door and window guide. I’ve been in the window and door industry for over 10 years in the UK and North America. I’ve had quite a few roles during my career mainly in Worldwide sales. I’m now semi retired so I thought I’d put my knowledge to good use educating people about all they might need to know about door and window related topics.