Garage Door Won’t Close All the Way: 9 Solutions with Videos

A malfunctioning garage door can be a frustrating issue for homeowners. When the door won’t close all the way, it not only compromises security but also creates potential hazards. Identifying the cause and implementing the right fixes can restore functionality and peace of mind.
Several factors might contribute to this problem, from technical issues with the opener to simple obstructions in the door’s path. Understanding these elements is essential for effective troubleshooting. Addressing the situation promptly can prevent further complications and ensure safe operation.
1) Check Sensor Alignment
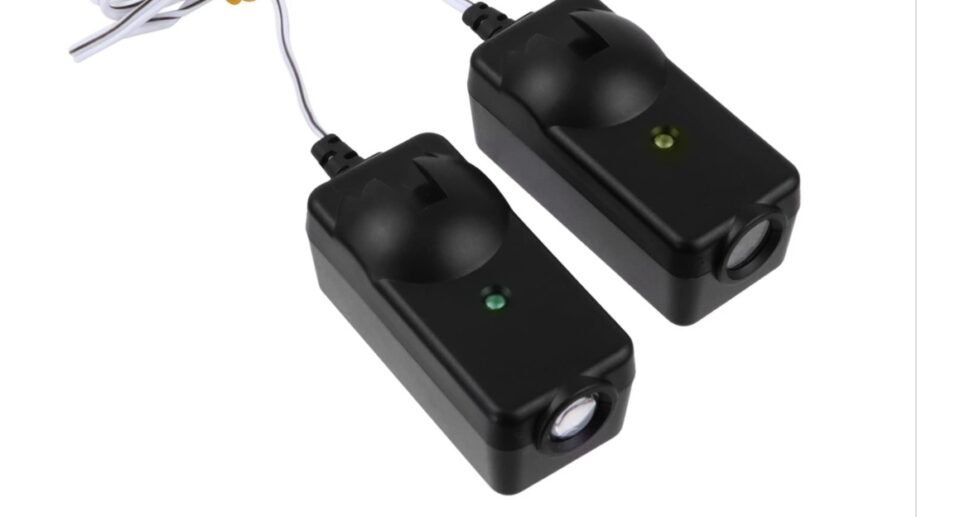
Misaligned garage door sensors are a common issue that can prevent a garage door from closing fully. These sensors, designed to detect obstacles in the door’s path, must be properly aligned to function effectively.
To check the sensor alignment, first inspect each sensor for obstructions. Dirt or debris can interfere with the sensor’s ability to send and receive signals. Cleaning the lenses with a soft cloth is a simple initial step.
Next, observe the alignment of both sensors. They should face each other directly, forming a clear line. If either sensor is tilted or moved, it can lead to communication errors.
Adjust the sensors carefully so they are parallel to each other and securely mounted. A minor adjustment may resolve the closing issue. After realignment, test the door to see if it closes all the way.
If problems persist despite alignment adjustments, further troubleshooting may be necessary, including checking wiring or inspecting the garage door opener.
2) Inspect the Tracks
Inspecting the tracks is crucial when a garage door won’t close all the way. Misalignment or damage to the tracks can hinder proper door operation.
Start by checking for bends or dents in the tracks. Even minor misalignments can prevent the door from closing completely. If any issues are found, gently use a rubber mallet to coax the track back into shape.
Next, examine the hardware. Loose screws or bolts may contribute to misalignment and should be tightened accordingly.
Debris in the tracks can also obstruct movement. Clear out any dirt, small stones, or other obstructions to ensure a smooth path for the door.
Regular inspection of the tracks helps maintain optimal function. Keeping these components in good condition can reduce the likelihood of operational issues in the future.
3) Clean the Garage Door Roller
Cleaning the garage door roller is essential for proper operation. Dirt, debris, and grease can accumulate over time, hindering the roller’s movement. This can prevent the door from closing fully.
To clean the rollers, first, disconnect the power to the garage door opener. This ensures safety during the cleaning process. Next, use a cloth or rag to wipe down each roller, removing any built-up dirt or grime.
If needed, a lubricant specifically designed for garage doors can be applied sparingly to help the rollers move smoothly. Avoid over-lubricating, as excess grease can attract more dirt.
Inspect the rollers for any signs of damage or wear. If they appear cracked or broken, replacement may be necessary to ensure safe operation. Regular maintenance of the rollers contributes to the overall functionality of the garage door system.
4) Test the Limit Settings
To resolve issues where a garage door does not close all the way, testing the limit settings is essential. Limit settings control how far the door moves down when closing.
First, locate the limit switch adjustment screws on the garage door opener. These screws typically regulate both the opening and closing ranges of the door.
If the door closes partially and then reopens, adjust the “Down” limit switch. Turning the screw clockwise in small increments can help the door close completely.
After making adjustments, test the door by pressing the “Close” button. Observe if the door now closes without reversing.
If the problem persists, further adjustments may be necessary. Patience is key, as incremental changes can lead to more precise results.
Regularly checking and adjusting these settings can help maintain optimal performance of the garage door. Proper limit settings ensure the door operates safely and effectively, reducing the likelihood of further issues.
5) Examine the Remote Control Batteries
Remote control batteries play a crucial role in the operation of a garage door. If the batteries are weak or dead, the remote may only send a partial signal, impacting its ability to close the door completely.
To start, it’s essential to check the battery level. A simple replacement with fresh batteries can resolve issues where the door opens but fails to close.
One common oversight is incorrect battery installation. Ensuring that the positive and negative terminals are aligned correctly helps in maintaining effective performance.
Additionally, corrosion on battery contacts can impede the connection. Cleaning the contacts may improve functionality if corrosion is present.
Testing the remote from different distances can also provide insight. If the remote works from some distances but not others, it may indicate insufficient battery power.
Regular battery maintenance can prevent interruptions in the garage door function. By examining and replacing the remote control batteries as needed, reliable operation is more likely.
6) Look for Obstructions
Obstructions are a common reason why a garage door won’t close fully. When items block the door’s path, the safety sensors may detect them and prevent closure.
First, inspect the area around the door. Clutter, toys, or tools can unintentionally obstruct the door’s movement. Often, simply removing these items can resolve the issue.
Next, check the sensors located at the bottom of the door tracks. If they are misaligned or dirty, the door may not operate correctly. The sensors must have a clear line of sight to function properly.
It’s also important to ensure that nothing is leaning against the door or situating in its path. Even small objects can catch the door’s sensor and cause it to reverse.
Taking these steps can significantly improve the likelihood of the garage door closing fully. Regular maintenance and checks can prevent obstruction issues from recurring.
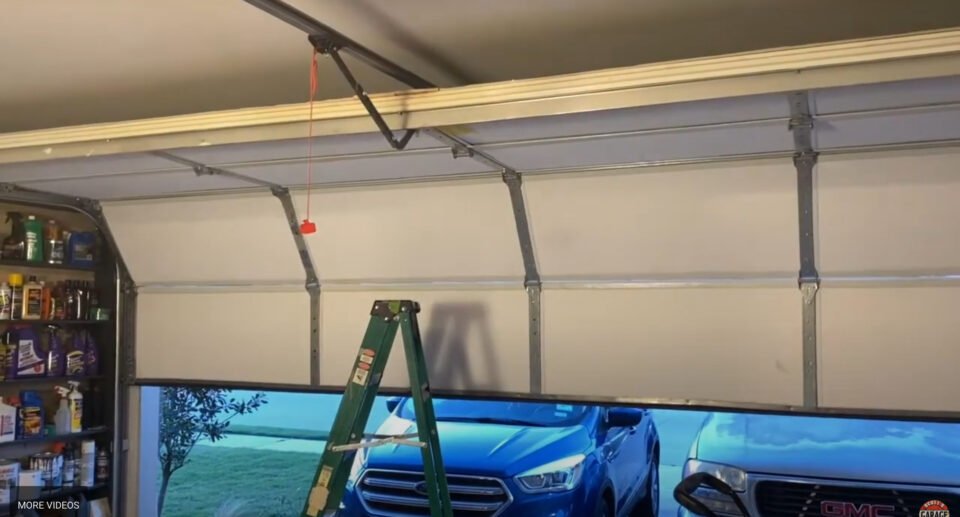
7) Review the Manual Release Settings
Checking the manual release settings is an important step when a garage door won’t close all the way. This feature allows for manual operation, especially during power outages or system malfunctions.
If the manual release is engaged, the door may not close completely. It is crucial to ensure that this mechanism is properly disengaged before attempting to close the door again.
Additionally, examine the release mechanism for any obstructions or damage. If the cord is tangled or the release lever is stuck, it can hinder normal operation.
Regular maintenance of the manual release can prevent future issues. Inspecting it periodically for wear or excess debris can help maintain proper functionality.
By reviewing these settings, one can identify if the problem lies within the manual release system, allowing for prompt corrective action.
8) Analyze the Door Springs
The door springs play a crucial role in the function of a garage door. They provide the necessary tension to lift and lower the door smoothly. If the springs are damaged or malfunctioning, the door may not close completely.
To assess the door springs, the individual should first identify whether they are torsion or extension springs. Torsion springs are located above the door, while extension springs are positioned along the tracks. Inspecting for visible signs of wear or damage is essential.
A common issue is the springs losing tension over time, which can prevent the door from lowering fully. If the springs appear stretched or show rust, they may need replacement.
It’s important to test the balance of the door. With the door closed, the user should disconnect the opener and manually lift the door halfway. If it doesn’t stay in place and falls or rises, the springs may need adjustment.
In many cases, adjusting or replacing springs can require specialized tools and knowledge. Therefore, consulting a professional may be the best course of action when dealing with garage door springs.
9) Lubricate Moving Parts
Regular lubrication of garage door components is essential for smooth operation. The moving parts, including rollers, hinges, and tracks, require appropriate lubrication to minimize friction.
Without sufficient lubrication, these parts can become stiff and lead to operational issues. It can hinder the door’s movement and prevent it from closing completely.
Using a garage door-specific lubricant is recommended. Products like silicone spray or garage door grease are suitable options.
To lubricate, access all moving parts of the door. It is crucial to distribute the lubricant evenly on rollers and hinges.
Care should be taken not to over-lubricate, as too much lubricant can attract dirt and grime.
Routine checks and lubrication can prevent many common problems related to garage doors. This maintenance will extend the life of the door and enhance its performance.
Preventative Maintenance Tips
Regular maintenance is essential for ensuring a garage door functions properly and minimizes issues such as failure to close completely. This section focuses on key practices that can help maintain the efficiency and longevity of a garage door system.
Regular Sensor Maintenance
Garage door sensors play a critical role in safety and functionality. Regularly check the sensors to ensure they are aligned and free of obstructions. Dust, debris, or misalignment can prevent proper functioning.
- Cleaning: Wipe the sensor lenses with a soft, dry cloth to remove dirt or cobwebs.
- Alignment Check: Ensure the sensors are facing each other and at the same height. Adjust as needed to maintain proper alignment.
- Testing: Regularly test the sensors by placing an object in the door’s path. The door should reverse upon detection of the obstruction.
By ensuring that these sensors work optimally, users can prevent unwanted closing issues.
Scheduling Professional Inspections
While DIY maintenance is important, professional inspections can identify issues not easily seen by the untrained eye.
- Annual Inspections: Schedule at least one professional inspection per year to check all mechanical and electrical components.
- Detailed Check-Up: Professionals will inspect springs, cables, hardware, and the opener mechanism, ensuring everything is in good condition.
- Early Detection: Early detection of problems can save costs associated with major repairs later on.
Regular professional assessments provide peace of mind and help maintain the garage door in optimal condition.

Hello, I’m Keith Jones. I’m the author and head of content here of door and window guide. I’ve been in the window and door industry for over 10 years in the UK and North America. I’ve had quite a few roles during my career mainly in Worldwide sales. I’m now semi retired so I thought I’d put my knowledge to good use educating people about all they might need to know about door and window related topics.


