Drywall Repair: Tips for Effective Fixes with Videos

Table of Contents
ToggleDrywall, a commonly used building material in many homes and buildings, is susceptible to damage from impacts, wear and tear, and moisture. Repairing drywall is a necessary skill for maintaining the appearance and structural integrity of interior walls and ceilings. Over time, you may encounter a range of issues with your drywall, such as small dents, nail pops, or even larger holes.
The process of repairing drywall involves preparation of the surface, application of the right materials, and refinishing steps to ensure that the repair is seamless. With the right tools and techniques, you can effectively mend these imperfections in the wall. Whether it’s a small scratch or a substantial hole, being knowledgeable in drywall repair techniques allows you to tackle the problem head-on, restoring the smooth and uniform surface of your walls.
Key Takeaways
- Maintaining drywall integrity is crucial for the appearance and structure of walls and ceilings.
- Correct preparation and application are vital for an effective drywall repair.
- A range of repair techniques enables seamless restoration of both minor and major damage.
Understanding Drywall
Before you can effectively repair drywall, it’s important for you to recognize the common types that you may encounter as well as typical problems such as cracks, holes, and dents. Knowledge on these topics ensures you can approach repairs with confidence.
Types of Drywall
Drywall comes in various types, each suited for different applications:
- Regular Drywall: The standard type used in most interior walls and ceilings.
- Moisture-Resistant Drywall: Also known as green board, ideal for high moisture areas like bathrooms.
- Fire-Resistant Drywall: Contains fibers that help in slowing the spread of fire.
- Soundproof Drywall: Designed to reduce noise transmission between rooms.
When selecting drywall, consider the specific needs of your space, whether it’s moisture resistance in a bathroom or soundproofing in a bedroom.
Common Drywall Problems
Your drywall can be subject to a range of problems, each requiring a unique approach for repair:
- Cracks: Usually appear at seams where two drywall sheets meet. Can be caused by foundation settling or improper installation.
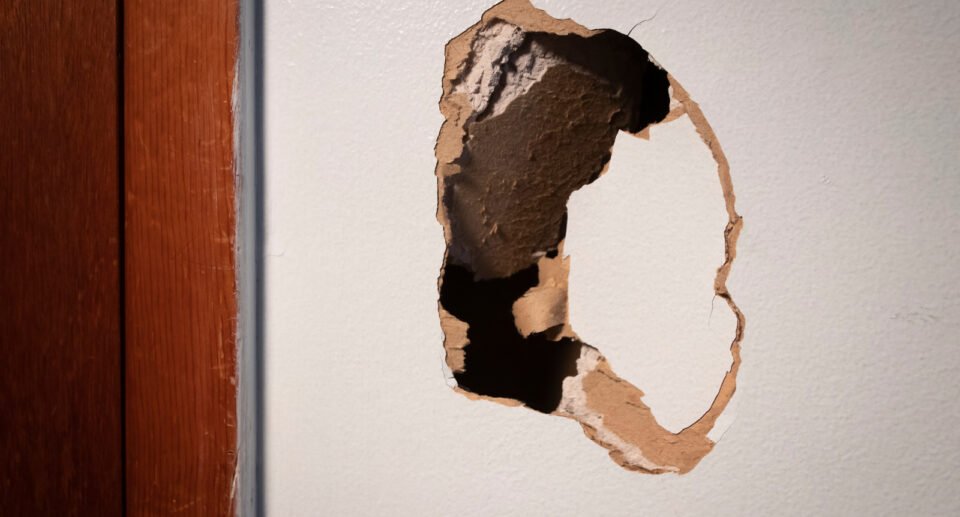
- Holes: May range from small punctures from nails to larger ones from doorknob impacts.
- Dents: Often the result of minor impacts and easier to repair than holes.
- Drywall Damage: General term that encompasses cracks, holes, dents, and can extend to water damage.
- Nail Pops: Occur when nail heads or screw heads become visible as the drywall moves or shifts.
Regular inspection of your walls and ceilings for these issues will allow you to maintain them and ensure your home’s interior remains in good condition.
Preparation for Drywall Repair
Before diving into the actual repair process, ensuring you have the right tools and materials at hand and understand necessary safety precautions is crucial for a successful and safe drywall repair.
Tools and Materials
To start your drywall repair project, you will need the following tools and materials:
- Utility Knife: For cutting drywall and trimming rough edges.
- Putty Knife: A 4- to 6-inch wide blade is essential for applying joint compound.
- Drywall Tape: Necessary for bridging the gaps between panels.
- Joint Compound: Also known as mud, used for bedding tape and smoothing out the repair.
- Drywall Screws: To secure drywall panels to studs.
- Stud Finder: To locate studs behind the drywall.
- Level: To ensure your repair is even and flush with the surrounding area.
- Corner Bead: For repairing and reinforcing outside corners.
- Sheetrock/Drywall: Extra panels may be needed for replacing large damaged areas.
- Drywall Taping Knife: A wider blade can help blend the joint compound seamlessly with the existing wall.
- Mesh Tape: Offers additional strength to the repaired areas.
- Sanding Sponge: For smoothing the dried joint compound.
Safety Precautions
When preparing for drywall repair, your safety should be a priority:
- Dust Mask: Wear a dust mask to prevent inhalation of fine dust particles when sanding.
- Eye Protection: Use safety glasses to shield your eyes from dust and debris.
- Gloves: Wear gloves to protect your hands from sharp edges and minimize direct contact with joint compound.
Remember to keep your workspace well-ventilated, especially when sanding, to avoid the build-up of dust, and always follow the manufacturer’s guidelines for the safe use of tools and materials.
Drywall Repair Techniques
When repairing drywall, the right technique depends on the size of the damage. Use spackle for small holes and a combination of a drywall patch and joint compound for larger repairs. Knowing how to correctly mend cracks and dents ensures a smooth, enduring finish.
Fixing Small Holes
For small holes, such as those left by screws or nails in your drywall, the repair process is fairly straightforward:
- Clear the Hole: Remove any debris or loose drywall around the hole.
- Spackle Application: Apply spackle with a putty knife, filling the hole completely.
- Smoothing: After the spackle dries, smooth it with a sanding block for a flush finish.
It is important to sand lightly and avoid depressions in the wall surface.
Repairing Large Holes
Addressing large holes in drywall requires additional steps to ensure stability and an unnoticeable repair:
- Cut a Patch: Using a drywall saw, cut a piece of drywall that matches the size of the hole.
- Support Structure: Attach a piece of wood or a metal patch behind the drywall for support.
- Secure the Patch: Fasten your drywall patch to the support with drywall screws, ensuring it is level with the surrounding wall.
- Tape the Seams: Apply mesh drywall tape around the edges of the patch.
- Apply Joint Compound: Cover the patch and mesh tape with joint compound, also known as mud, spreading past the edges of the patch to blend it with the existing wall. Allow it to dry thoroughly, applying additional coats as needed.
- Sanding: Gently sand the dried mud for a smooth, seamless surface.
Mending Cracks and Dents
For cracks and dents, a careful approach is required to prevent future damage:
- Clean the Area: Ensure the crack or dent is free of debris and dust.
- Apply Joint Compound: If using plaster, press it into the crack or dent. For wider cracks, use joint compound or a combination of mesh tape and mud.
- Let It Dry: Allow the repair to dry completely.
- Sand Smoothly: Sand the area to create a flat surface.
With all drywall repairs, apply primer before painting to conceal the repair and prevent the joint compound from bleeding through the paint.
Finishing Touches
Proper finishing is essential to ensure your drywall repair blends seamlessly with the rest of your wall. Attention to detail in sanding and painting is what will make your repair work invisible.
Sanding and Smoothing
After your drywall compound has thoroughly dried, your next step is to sand the area to create a smooth surface. Use a sanding sponge for corners and edges to avoid gouging the drywall. You should aim for a feathered edge where the compound meets the existing wall. This step may need to be repeated to achieve a perfectly smooth surface, with each layer of compound applied thinner than the last.
Painting and Priming
Once the surface is smooth and free of any dust from sanding, start with a coat of primer. This will ensure that your wall paint adheres properly and provides consistent color. After priming and allowing ample time for it to dry, apply your wall paint, ideally using the same paint as the rest of the wall for an exact match. Multiple coats may be necessary to achieve the desired coverage and look.
Professional Drywall Repair
Drywall repair can be a crucial step in maintaining the structural integrity and aesthetic of your home. Recognizing when professional assistance is needed and what services to expect can ensure long-lasting results.
When to Call a Professional
- Significant Damage: If you’re faced with large holes, extensive water damage, or cracks from settling, it’s time to seek a pro.
- Structural Concerns: For situations where the damage might affect the underlying structure, such as sagging ceilings or compromised wall studs, a professional can provide the necessary expertise.
- Quality Finish: When the final appearance is paramount, especially in prominent areas of your home, hiring a professional ensures a seamless repair.
What to Expect from Professional Services
Assessment and Quote
- A thorough examination of the damaged area.
- A transparent pricing quote comparing various pros if needed.
Repair Process
- Matching the existing wall texture and paint for a consistent look.
- High-quality materials and tools to ensure durability.
Service Quality
- Timely completion of repair work.
- Cleanup and disposal of any repair-related debris.
Remember, while DIY repairs might be sufficient for minor blemishes or the occasional nail pop, professional drywall repair services offer the expertise to tackle more complex issues, ensuring a repair that’s both durable and visually pleasing.
Frequently Asked Questions
Lorem ipsum dolor sit amet, consectetur adipiscing elit. Ut elit tellus, luctus nec ullamcorper mattis, pulvinar dapibus leo.
For large holes, you’ll need to cut a piece of drywall to fit the hole snugly. You may use furring strips or a plywood backing for support, then secure the patch with drywall screws. Apply joint compound and tape around the edges, finishing with sanding for a smooth appearance.
To repair small holes, such as those from nails or screws, fill the hole with spackling paste or a joint compound. Once it dries, sand the area until it’s flush with the surrounding surface. For an effective repair, the area should then be primed and painted.
DIY repairs can be reliable for common issues like nail pops or small to medium holes. Accurate information and following the right steps are crucial. Be prepared with the right tools and materials, and take your time to do the job correctly.
A basic drywall repair kit should include spackling paste or joint compound, drywall tape or mesh, sandpaper, a putty knife, and a drywall saw for larger repairs. Drywall screws and a screwdriver or drill are also necessary if you’re dealing with bigger patches.
Drywall tape is applied over the seams where two pieces of drywall meet or over a patch to ensure a smooth and secure bond. Cover the tape with joint compound, and after it dries, apply additional coats to hide any ridges or lines, sanding between layers for smooth results.
The costs vary widely based on the size and complexity of the job. On average, the cost to repair drywall is around $294 to $921. Charges can be based on square footage, with rates ranging from $50 to $75 per square foot, or hourly rates between $60 and $100.

Hello, I’m Keith Jones. I’m the author and head of content here of door and window guide. I’ve been in the window and door industry for over 10 years in the UK and North America. I’ve had quite a few roles during my career mainly in Worldwide sales. I’m now semi retired so I thought I’d put my knowledge to good use educating people about all they might need to know about door and window related topics.


