How Long for Frozen Pipes to Thaw Naturally: Expert Insights

Table of Contents
ToggleFrozen pipes are a common problem during the winter season. When the temperature drops below freezing, water inside the pipes can freeze, causing them to expand and potentially burst. Thawing frozen pipes is crucial to prevent any damage to the plumbing system.
But how long does it take for frozen pipes to thaw naturally?
The amount of time it takes for frozen pipes to thaw naturally depends on several factors. These include the temperature outside, the location of the frozen pipes, and the severity of the freeze. In general, it can take several hours, days, or even weeks for frozen pipes to thaw naturally.
However, waiting for them to thaw on their own can be risky, as it increases the risk of the pipes bursting.
To speed up the thawing process, there are several methods that homeowners can use, such as using a hairdryer or heat lamp. However, it is essential to take precautions to avoid damaging the pipes or causing a fire.
If the pipes are frozen for an extended period, it is best to call a professional plumber to thaw them safely and efficiently.
Key Takeaways
- Frozen pipes can take several hours, days, or even weeks to thaw naturally.
- Homeowners can use various methods to speed up the thawing process, but caution is necessary to avoid damage or fire.
- If the pipes remain frozen for an extended period, it is best to call a professional plumber.
Understanding Frozen Pipes to Thaw Naturally
What Causes Pipes to Freeze
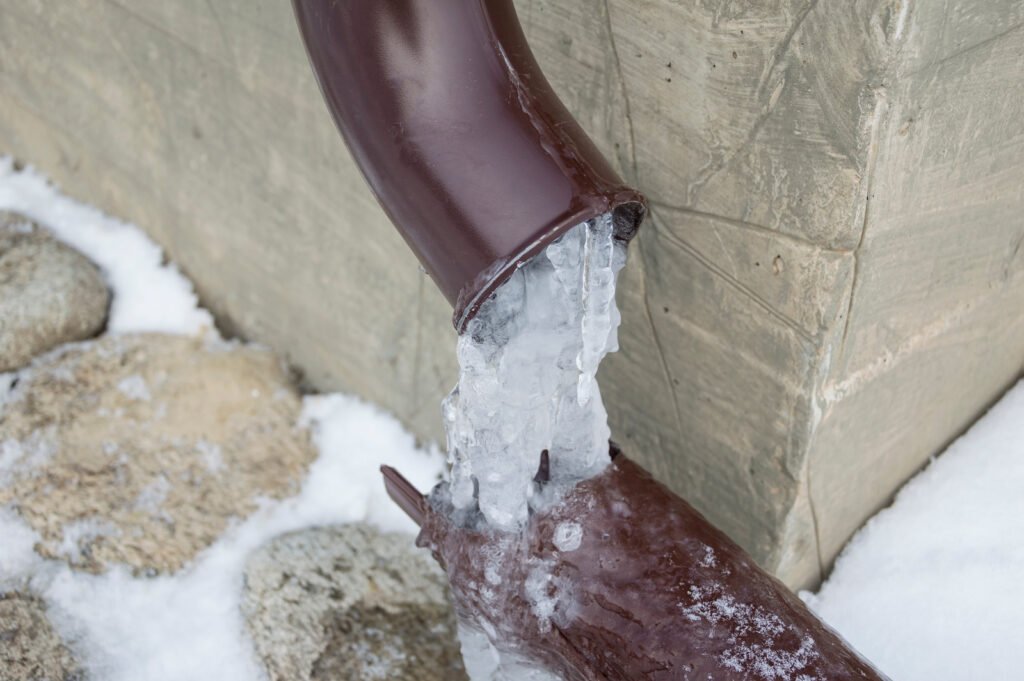
Frozen pipes are a common problem during the winter season. Water freezes when the temperature drops below 32°F (0°C), and when this happens, it expands. This expansion can create pressure within the pipe, causing it to burst.
Pipes that are exposed to cold air are more likely to freeze, but even those that are located in areas that are not exposed to cold air can still freeze if the temperature drops low enough.
Risks of Frozen Pipes
When pipes freeze, they can cause a lot of damage to a home. In addition to the risk of bursting, frozen pipes can also cause a decrease in water pressure and a lack of hot water.
If a pipe bursts, it can cause flooding and water damage to a home’s walls, floors, and furnishings. The cost of repairing the damage caused by frozen pipes can be significant and can take a lot of time and effort.
To prevent frozen pipes, homeowners can take several measures, such as insulating pipes, sealing air leaks, and keeping the home at a consistent temperature.
If a homeowner suspects that their pipes are frozen, they should take immediate action to thaw them out to prevent bursting.
There are several methods to thaw frozen pipes, including using a hairdryer, heat lamp, or hot water. It is important to note that homeowners should never use an open flame to thaw pipes, as this can be extremely dangerous.
Factors Affecting Thawing Time
Thawing frozen pipes can take a considerable amount of time, and the duration can be affected by several factors. Some of the factors that can affect the thawing time of frozen pipes are discussed below.
Insulation and Pipe Material
The type of insulation and pipe material can play a significant role in the thawing time of frozen pipes.
Insulated pipes can take longer to thaw than non-insulated pipes because the insulation slows down the heat transfer process. Similarly, pipes made of materials that are good conductors of heat, such as copper, can thaw faster than pipes made of materials that are poor conductors of heat, such as PVC.
Ambient Temperature
The ambient temperature can also affect the thawing time of frozen pipes. If the temperature is very cold, it can take longer for the pipes to thaw.
Additionally, if the temperature is too warm, it can cause the pipes to expand rapidly, which can lead to bursting. Therefore, it is important to maintain a moderate temperature during the thawing process.
Pipe Location
The location of the frozen pipes can also affect the thawing time. Pipes that are exposed to the cold temperature can freeze faster than pipes that are located in warmer areas.
Additionally, pipes that are located in hard-to-reach areas, such as inside walls or under floors, can take longer to thaw because it is difficult to apply heat to these areas.
Signs of Frozen Pipes
Frozen pipes can be a serious problem for homeowners, especially during cold winter months. It is important to be able to identify the signs of frozen pipes to prevent further damage and costly repairs. Here are some common signs to look out for:
Lack of water flow: One of the first signs of frozen pipes is a decrease in water flow or no water at all. If you turn on a faucet and only a trickle of water comes out, it could be a sign of a frozen pipe.
Strange noises: If you hear strange noises coming from your pipes, such as gurgling or banging, it could also be an indication of a frozen pipe. As water tries to flow through a blocked pipe, it can create pressure that causes the pipe to make noise.
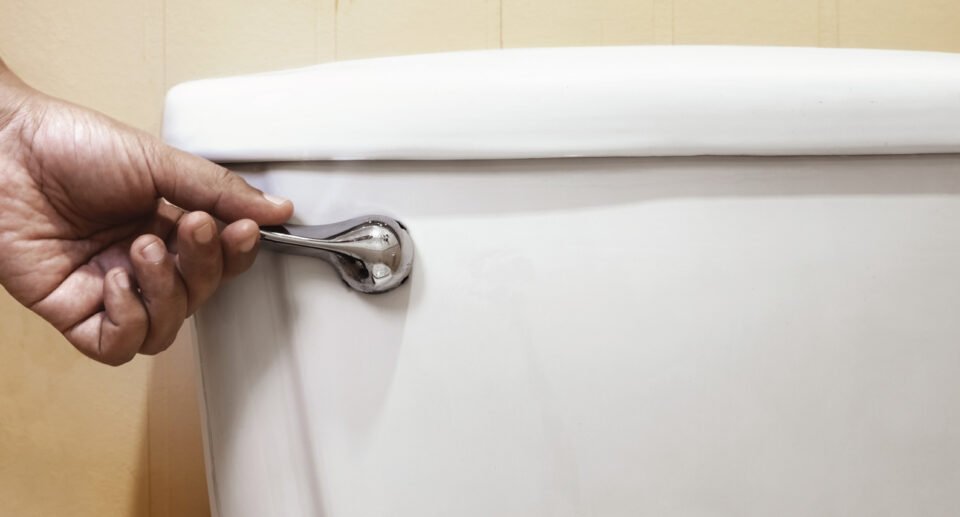
Blockages: Another sign of a frozen pipe is if you notice a blockage in your plumbing system. If you flush a toilet and the water doesn’t go down or water backs up into a sink or tub, it could be a sign of a frozen pipe.
It is important to address frozen pipes as soon as possible to prevent further damage. If you suspect that you have a frozen pipe, it is best to call a professional plumber to assess the situation and take the necessary steps to thaw the pipe safely.
Thawing Frozen Pipes Naturally
When dealing with frozen pipes, it is important to act quickly to prevent further damage. While manual thawing methods or professional assistance can provide faster results, some homeowners may prefer to wait for natural thawing to occur.
In this section, we will explore passive thawing techniques and when it is appropriate to wait for natural thawing.
Passive Thawing Techniques
Passive thawing techniques involve allowing the frozen pipes to thaw on their own without the use of external heat sources. This method is not recommended for severe freezes or when there is a risk of bursting pipes. However, in some cases, it can be a viable option.
One passive thawing technique is to open the faucets and allow a small amount of water to trickle through the pipes. This can help to relieve pressure and allow the ice to melt more quickly.
Another technique is to increase the temperature in the room where the frozen pipes are located. This can be done by using a space heater or opening doors to allow warmer air to circulate.
When to Wait for Natural Thawing
It is important to note that waiting for natural thawing to occur can be risky. As the pipes thaw, there is a risk of increased pressure, which can cause the pipes to burst.
Homeowners should only consider waiting for natural thawing if the freeze is minor and there is no risk of bursting pipes.
In addition, it is important to monitor the situation closely and take action if there are any signs of further damage or if the pipes do not thaw within a reasonable amount of time.
If the freeze is severe or if there is a risk of bursting pipes, it is recommended to seek professional assistance or use manual thawing methods.
Preventative Measures
When it comes to preventing frozen pipes, there are several steps that homeowners can take to minimize the risk of damage. By insulating pipes, maintaining a consistent temperature, and strategically using water, homeowners can help prevent frozen pipes and avoid costly repairs.
Insulating Your Pipes
One of the most effective ways to prevent frozen pipes is to insulate them properly. This involves wrapping pipes with heat tape or foam insulation to help keep them warm and prevent heat loss.
By insulating pipes, homeowners can help keep water flowing and avoid the risk of frozen pipes.
Maintaining a Consistent Temperature
Another important step in preventing frozen pipes is to maintain a consistent temperature in the home.
This involves keeping the thermostat set at a consistent temperature, even when the home is unoccupied. By maintaining a consistent temperature, homeowners can help prevent pipes from freezing and avoid the risk of damage.
Strategic Use of Water
Finally, homeowners can help prevent frozen pipes by using water strategically.
This involves allowing a small trickle of water to flow through the pipes during periods of extreme cold to help prevent freezing.
Additionally, homeowners should locate the main shutoff valve in case of an emergency and avoid using any open flame devices or high-powered heaters to thaw pipes, as this can be dangerous and increase the risk of bursting.
Emergency Actions if Pipes Freeze
When pipes freeze, it can cause significant damage to one’s home. It’s important to take immediate action to minimize damage and prevent further problems. Here are some emergency steps to take if your pipes freeze:
Immediate Steps to Minimize Damage
Turn off the main water valve: The main water valve is usually located near the water meter. Turning it off will stop the flow of water to your home and prevent any further damage from occurring. This is especially important if you suspect that the frozen pipe has already burst.
Open the faucet: Opening the faucet will help relieve pressure in the pipes and allow water to flow through the system. This can help prevent the pipe from bursting and causing further damage.
Apply heat to the frozen pipe: You can use a hair dryer, heat lamp, or space heater to thaw the frozen pipe. Be sure to keep the heat source a safe distance away from any flammable materials and never leave it unattended.
Check for leaks: Once the pipe has thawed, check for any leaks or damage. If you notice any leaks, turn off the main water valve and call a licensed plumber.
When to Call a Plumber
If you’re not comfortable thawing the frozen pipe yourself or if you suspect that the pipe has already burst, it’s best to call a licensed plumber.
A plumber will have the knowledge and tools to safely thaw the pipe and make any necessary repairs.
If you’re unable to locate the main water valve or if you’re not sure how to turn it off, you should also call a plumber or emergency service. They can help you locate the valve and turn off the water supply to your home.
Professional Thawing Techniques
While manual thawing techniques can be effective, there are times when it is best to call in a professional plumber to handle the job.
A professional plumber has the knowledge and experience to safely and effectively thaw frozen pipes, minimizing the risk of damage to your plumbing lines.
One of the techniques that a professional plumber may use is an infrared lamp. This type of heat source can be directed at the frozen pipes, quickly and evenly warming them up and allowing them to thaw naturally.
The use of an infrared lamp ensures that the heat is distributed evenly, reducing the risk of damage to the pipes.
Another professional thawing technique is the use of heat tape. Heat tape is a specialized type of tape that is wrapped around the frozen pipes and then plugged in. The tape heats up, warming the pipes and causing them to thaw.
While heat tape can be effective, it must be used carefully to avoid overheating and damaging the pipes.
In some cases, a professional plumber may use a combination of techniques to thaw frozen pipes. This may include using an infrared lamp in combination with heat tape or other heat sources.
It is important to note that not all thawing techniques are appropriate for all situations. A professional plumber will be able to assess the situation and determine the best technique for thawing the frozen pipes. They will also be able to ensure that the job is done safely and effectively, minimizing the risk of damage to your plumbing lines.
DIY Thawing Methods
When facing frozen pipes, there are several DIY methods that can be used to thaw them. However, it is important to note that these methods should only be attempted by those who are confident and knowledgeable in plumbing and DIY work. Here are some of the most common DIY methods for thawing frozen pipes:
Using Heat Lamps and Space Heaters
One of the most common DIY methods for thawing frozen pipes is to use heat lamps or space heaters. These devices can be used to slowly warm up the area around the frozen pipe.
When using a heat lamp or space heater, make sure to keep the device at a safe distance from any flammable materials. Additionally, monitor the device closely to ensure that it does not overheat or cause any damage to the surrounding area.
Applying Direct Heat
Another DIY method for thawing frozen pipes is to apply direct heat to the affected area. This can be done using a hair dryer, heating pad, or towels that have been soaked in hot water.
When using a hair dryer or heating pad, make sure to keep the device moving to prevent any one area from overheating. Additionally, change towels frequently to ensure that they remain hot and effective.
Safety Precautions for DIY Methods
When attempting to thaw frozen pipes using DIY methods, make sure to take a number of safety precautions. These include:
- Turning off the water supply to the affected area before beginning any work
- Wearing protective gear, such as gloves and eye protection
- Keeping flammable materials away from any heat sources
- Using caution when working with open flames, such as propane torches or heat guns
Aftermath of Thawing
Once frozen pipes have thawed, there are a few things that homeowners should be aware of to prevent further damage to their property. This section will cover dealing with water damage and preventing mold and mildew.
Dealing with Water Damage
Thawed pipes can potentially rupture and cause water damage to a home. If a pipe has ruptured, the first thing to do is shut off the main water supply to the house. This will prevent further water damage and leaks.
Homeowners should then mop up any standing water and dry the affected area as quickly as possible to prevent mold and mildew growth.
If the water damage is extensive, it may be necessary to contact a professional water damage restoration company. They have the expertise and equipment to quickly and effectively remove water and dry out the affected area.
Preventing Mold and Mildew
Mold and mildew can start to grow within 24-48 hours of water damage, so it’s important to act quickly to prevent their growth. Homeowners should thoroughly dry the affected area and use a dehumidifier to remove excess moisture from the air.
If mold or mildew has already started to grow, you can use a solution of bleach and water to clean mold and mildew from hard surfaces. For soft surfaces, such as carpet or upholstery, it may be necessary to contact a professional mold remediation company.
Long-Term Solutions
When it comes to preventing frozen pipes, there are a few long-term solutions that homeowners can consider. These solutions can help reduce the risk of frozen pipes and minimize the damage that can occur if pipes do freeze.
Upgrading Insulation
One of the most effective ways to prevent frozen pipes is to upgrade the insulation in your home. This can include adding insulation to walls, attics, and crawl spaces.
By adding insulation, you can help keep your home warmer and reduce the risk of pipes freezing.
In addition to upgrading insulation, homeowners can also use insulating tape or heating cable to protect pipes from freezing. These materials can be wrapped around pipes to help keep them warm and prevent them from freezing.
Regular Maintenance Checks
Another important long-term solution is to schedule regular maintenance checks for your plumbing system. This can help identify potential issues before they become major problems.
During a maintenance check, a plumber can inspect your pipes and identify any areas that may be at risk of freezing.
Homeowners can also take steps to prevent frozen pipes by keeping their homes warm during the winter months. This can include using a programmable thermostat to regulate the temperature in the home, and keeping doors and windows closed to prevent cold air from entering.
It is important to note that if pipes do freeze, homeowners should never use PVC or kerosene to try and thaw them. These materials can cause damage to pipes and create a fire hazard. Instead, homeowners should follow safe thawing techniques such as using a hair dryer or hot water to slowly thaw the pipes.
Frequently Asked Questions
The time it takes for frozen pipes to thaw naturally without intervention can vary widely depending on several factors. The ambient temperature, the length of the pipe, and the material of the pipe are all significant factors.
In general, it can take several hours to several days for pipes to thaw naturally.
Yes, it is recommended to shut off the water supply to your house if the pipes have frozen. This will prevent any further water from entering the pipes and causing them to burst.
It is also essential to turn off the water supply to your house before attempting to thaw any frozen pipes.
Frozen pipes will generally start to thaw when the ambient temperature rises above freezing point (32°F or 0°C). However, the thawing process can be slow and may take several hours or even days to complete.
There are several effective methods to encourage the thawing of frozen pipes.
One method is to use a hair dryer or heat lamp to apply heat directly to the frozen section of the pipe.
Another method is to wrap the frozen pipe with an electric heating pad or towels soaked in hot water.
It is also essential to keep the faucet open to allow the water to flow through the pipe as it thaws.
Pipes can remain frozen for several hours without any risk of bursting. However, if the pipes remain frozen for an extended period, there is a risk of them bursting due to the pressure buildup caused by the expanding ice.
It is not recommended to allow frozen pipes to thaw by themselves. Natural thawing can take a long time.
The slow melting process can cause the pipes to burst due to the pressure buildup caused by the expanding ice. You should take action to thaw the pipes as soon as possible to prevent any damage to the pipes and your property.

Hello, I’m Keith Jones. I’m the author and head of content here of door and window guide. I’ve been in the window and door industry for over 10 years in the UK and North America. I’ve had quite a few roles during my career mainly in Worldwide sales. I’m now semi retired so I thought I’d put my knowledge to good use educating people about all they might need to know about door and window related topics.