How to Remove Window Tint: Step-by-Step Guide With Video

Table of Contents
ToggleRemoving window tint can be a challenging task, but it is often necessary for a variety of reasons. Perhaps the tint has become faded or damaged, or maybe it is simply time for a change.
Whatever the reason, there are several effective techniques to remove window tint, ranging from DIY methods to professional services.
Before starting the removal process, it is important to understand the type of window tint that is being removed.
There are several different types of window tint, each with its own set of characteristics and removal methods. Some tints are self-adhesive, while others are applied with a heat gun or other tool.
Understanding the type of tint is crucial for determining the best removal method.
Once the type of tint has been identified, preparation is key.
The window should be thoroughly cleaned and dried, and any surrounding areas should be protected from damage.
Some removal methods require the use of chemicals or heat, so it is important to take appropriate safety precautions.
With the right preparation and technique, removing window tint can be a straightforward process that yields great results.
Key Takeaways
- Understanding the type of window tint is crucial for determining the best removal method.
- Proper preparation is key to successfully removing window tint.
- With the right technique and safety precautions, removing window tint can be a straightforward process.
Understanding: Remove Window Tint
Window tinting has become increasingly popular in recent years due to its various benefits. However, there are times when it becomes necessary to remove the tint.
In this section, we will discuss the types of window tint, reasons for removal, and the legality and regulations surrounding window tinting.
Types of Window Tint
There are different types of window tint available in the market. The most common types include:
- Dyed Window Tint: This type of tint is made by adding dye to the film. It is the most affordable option and provides a darker shade. However, it is not very effective in blocking heat.
- Metalized Window Tint: This type of tint is made by adding small metallic particles to the film. It is more effective in blocking heat and UV rays than dyed window tint. However, it can interfere with electronic signals and cause problems with GPS and radio reception.
- Ceramic Window Tint: This type of tint is made by adding ceramic particles to the film. It is the most expensive option but provides the best heat and UV ray protection. It also does not interfere with electronic signals.
Reasons for Removal
There are various reasons why someone may need to remove window tint. Some of these reasons include:
- Fading: Over time, window tint can fade and lose its effectiveness.
- Damage: Window tint can get damaged due to accidents or scratches.
- Peeling: Poor quality tint or improper installation can cause the tint to start peeling.
- Change of Aesthetics: The owner may decide to change the look of their car or home and remove the tint.
Legality and Regulations
It is important to note that there are laws and regulations in place regarding window tint. The darkness of the tint is regulated and varies depending on the state or country.
In Australia, for example, the maximum allowable tint for front windscreens is 35%, while for rear windows, it is 20%.
It is also important to ensure that the tint is installed by a licensed professional. Illegal installation can lead to fines and even the removal of the tint.
Preparation for Removal
Before removing window tint, it is essential to prepare the necessary tools and protect the surrounding areas. Here are some steps to follow:
Gathering Necessary Tools
To remove the window tint, you will need a few essential tools, including a scraper, razor, heat gun or steamer, microfiber cloth, and tarp.
Additionally, you can use ammonia-based cleaner, newspaper, or trash bags.
A scraper or razor blade is useful for removing the tint from the window. A heat gun or steamer can be used to loosen the adhesive and make it easier to remove the tint.
A microfiber cloth is used to clean the window after removing the tint, and a tarp can be used to protect the surrounding areas from damage.
Protecting Surrounding Areas
It is important to protect the surrounding areas from damage during the tint removal process.
Cover the dashboard, seats, and other interior surfaces with a tarp to prevent any damage from the heat gun or steamer. Also, cover the door panels with newspaper or trash bags to prevent any damage from the ammonia-based cleaner.
Techniques for Removing Window Tint
When it comes to removing window tint, there are several techniques that can be used. These techniques include heat application, steaming, and the soapy water method.
Each of these methods has its own advantages and disadvantages, and the choice of method will depend on the individual’s preference.
Heat Application Method
The heat application method involves using a hairdryer or heat gun to warm up the tinted area. This will cause the adhesive to loosen, making it easier to remove the tint.
It is important to be careful when using this method, as excessive heat can damage the window or surrounding areas.
To use this method, simply hold the hairdryer or heat gun about 6 inches away from the window and move it back and forth over the tinted area.
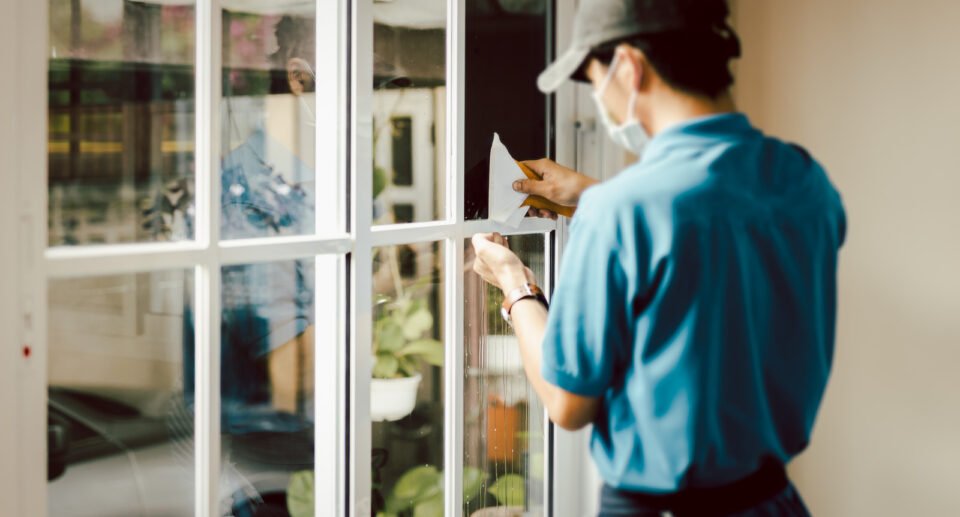
Once the adhesive has loosened, use a razor blade or tint scraper to peel off the tint.
Steaming Method
The steaming method involves using a steamer to soften the adhesive and remove the tint. This method is less likely to damage the window or surrounding areas than the heat application method.
To use this method, roll down the window and apply the steamer to the tinted area. Once the adhesive has softened, use a razor blade or tint scraper to peel off the tint.
Soapy Water Method
The soapy water method is a simple and effective way to remove window tint. This method involves using a mixture of dish soap and water to loosen the adhesive and peel off the tint.
To use this method, mix a solution of dish soap and water and apply it to the tinted area.
Let the solution sit for a few minutes, then use a razor blade or tint scraper to peel off the tint. Be sure to rinse the window thoroughly with water to remove any soap residue.
Handling Adhesive Residue
Removing window tint is only half the battle. Once the tint is off, the adhesive residue remains. Here are some ways to remove the sticky residue left behind:
Adhesive Removal Solutions
There are a variety of adhesive removal solutions available that can effectively remove the sticky residue.
One popular option is Goo Gone, which is a commercial adhesive remover that is widely available in hardware stores. Other options include vinegar, rubbing alcohol, and WD-40.
To use an adhesive remover, apply it to a clean cloth and rub the residue until it begins to dissolve.
Allow the solution to sit for a few minutes to penetrate the adhesive before wiping it away with a clean cloth. Do not use excessive force or scrub too hard, as this can damage the glass surface.
Mechanical Scraping
If the adhesive residue is particularly stubborn, mechanical scraping may be necessary. However, it is important to be cautious when using this method to avoid damaging the glass.
To use mechanical scraping, use a plastic scraper or a razor blade to gently scrape away the residue.
Be sure to hold the blade at a low angle to avoid scratching the glass surface. It is recommended to use a glass cleaner or water to lubricate the surface and make it easier to scrape away the residue.
Finishing Touches
After removing the window tint, it is important to give the glass surface a thorough cleaning to ensure that it is free from any adhesive residue or other debris. Here are some steps to follow for cleaning the glass surface:
Cleaning the Glass Surface
- Spray a generous amount of glass cleaner onto the glass surface.
- Use a microfiber towel to wipe the glass surface in a circular motion.
- Repeat steps 1 and 2 until the glass surface is completely clean and free from any residue or streaks.
It is important to use a microfiber towel when cleaning the glass surface as it is gentle and will not scratch the glass. Avoid using any abrasive materials or harsh chemicals that can damage the glass surface.
Inspecting for Damage
After removing the window tint and cleaning the glass surface, it is important to inspect the glass for any damage that may have occurred during the removal process.
Look for any scratches or chips on the glass surface. If any damage is found, it is important to have it repaired as soon as possible to prevent further damage.
Professional Removal Services
If you are not comfortable removing the tint yourself, or if the tint is particularly difficult to remove, seeking professional help may be the best option.
When to Seek Professional Help
If you have attempted to remove the tint yourself but have been unsuccessful, or if you do not have the necessary tools or skills, it may be time to seek professional help.
Additionally, if your vehicle has multiple layers of tint, or if the tint has been on the windows for a long time, it can be challenging to remove, and professional help may be required.
Costs and Considerations
Professional tint removal services can vary in cost. The price depends on the location, the size of the vehicle, and the difficulty of the job. On average, the cost can range from $50 to $200.
However, it is essential to consider the cost versus the benefit of hiring a professional. If you have attempted to remove the tint yourself and have caused damage to the windows, the cost of repairing the damage can be much higher than the cost of hiring a professional.
When considering a professional tint removal service, it is essential to research the company and read reviews from previous customers. Look for a company that has experience in tint removal and uses high-quality tools and equipment.
Additionally, ask for a quote before hiring a professional. Ensure that the cost includes all necessary services and any potential additional charges.
Post-Removal Care and Maintenance
After successfully removing the window tint, it is important to take care of the windows to ensure their longevity. This section will cover some post-removal care and maintenance tips to keep your windows in top condition.
Regular Cleaning and Detailing
Regular cleaning and detailing of the windows is essential to maintain their clarity and prevent the buildup of dirt and grime.
Use a high-quality glass cleaner and a microfiber cloth to clean the windows. Avoid using abrasive cleaners or harsh chemicals as they can damage the glass.
It is also important to clean the windows from both sides to ensure there are no smudges or streaks left behind.
In addition to regular cleaning, detailing the windows can help restore their shine and clarity.
Use a detailing clay bar to remove any contaminants from the glass and follow up with a glass polish to remove any scratches or imperfections.
A ceramic coating can also be applied to the windows to provide long-lasting protection and prevent future damage.
Window Tint Replacement Options
If you have removed the window tint for any reason, you may want to consider replacing it with a new one. There are several window tint replacement options available, each with its own benefits and drawbacks.
Some popular options include:
- Ceramic Tint: Ceramic tint is a high-quality option that provides excellent heat rejection and UV protection. It is also less reflective than other types of tint, making it a popular choice for luxury vehicles.
- Dyed Tint: Dyed tint is a more affordable option that provides good heat rejection and privacy. However, it is less effective at blocking UV rays and may fade over time.
- Carbon Tint: Carbon tint is a mid-range option that provides good heat rejection and UV protection. It is also less reflective than other types of tint, making it a popular choice for those who want a more subtle look.
Regardless of which window tint replacement option you choose, it is important to have it installed by a professional to ensure proper application and longevity.
Common Issues and Solutions
Dealing with Bubbling
One common issue that can arise when removing window tint is bubbling. This occurs when air gets trapped between the tint and the window, causing unsightly bubbles to form. To avoid this issue, you need to use a precise technique when removing the tint.
One solution to this problem is to use a heat gun or hairdryer to warm up the tint. This will make it easier to peel off without causing any damage to the window.
Another solution is to use a tint scraper or razor blade to carefully remove the tint, making sure to avoid creating any bubbles.
Preventing Discoloration
Another common issue that can occur when removing window tint is discoloration. This occurs when the tint has been on the window for a long time and has started to fade or change color. To prevent this from happening, you need to take the proper steps when removing the tint.
One solution to this problem is to use a tint-specific cleaner that is designed to remove the tint without causing any damage to the window.
Another solution is to use a soft cloth or sponge to gently scrub away any residue that may be left behind after removing the tint. It is important to avoid using harsh chemicals or abrasive materials, as these can cause damage to the window and lead to discoloration.
Frequently Asked Questions
There are several methods that can be used to remove window tint at home. One of the most popular methods is to use heat to soften the adhesive and then peel off the tint.
Another method is to use a soapy water solution to loosen the adhesive and then peel off the tint. Other methods include using an ammonia/water solution, steaming, or using a razor blade or plastic card to scrape off the tint.
While heat is one of the most effective ways to remove window tint, it is possible to remove it without using heat. One method is to use a soapy water solution to loosen the adhesive and then peel off the tint.
Another method is to use an ammonia/water solution or steaming to loosen the adhesive. However, these methods may require more time and effort than using heat.
There are several chemicals that are effective in dissolving window tint adhesive. Some of these chemicals include ammonia, vinegar, and rubbing alcohol. However, it is important to use these chemicals with caution and follow proper safety precautions.
Yes, vinegar can be used to strip window tint. Vinegar is an acid that can help to dissolve the adhesive on the tint. However, it is important to use vinegar with caution and follow proper safety precautions.
Some tools that might be needed for DIY window tint removal include a hairdryer or heat gun, a razor blade or plastic card, a steamer, and a soapy water solution. It is also important to wear gloves and protective eyewear to avoid injury.
WD-40 is a popular multi-purpose lubricant. However, it is not recommended for use in removing window tint. The chemicals in WD-40 can damage the glass and surrounding surfaces.
Also, WD-40 may not effectively remove the tint adhesive. It is best to use a method that is specifically designed for window tint removal.

Hello, I’m Keith Jones. I’m the author and head of content here of door and window guide. I’ve been in the window and door industry for over 10 years in the UK and North America. I’ve had quite a few roles during my career mainly in Worldwide sales. I’m now semi retired so I thought I’d put my knowledge to good use educating people about all they might need to know about door and window related topics.


